
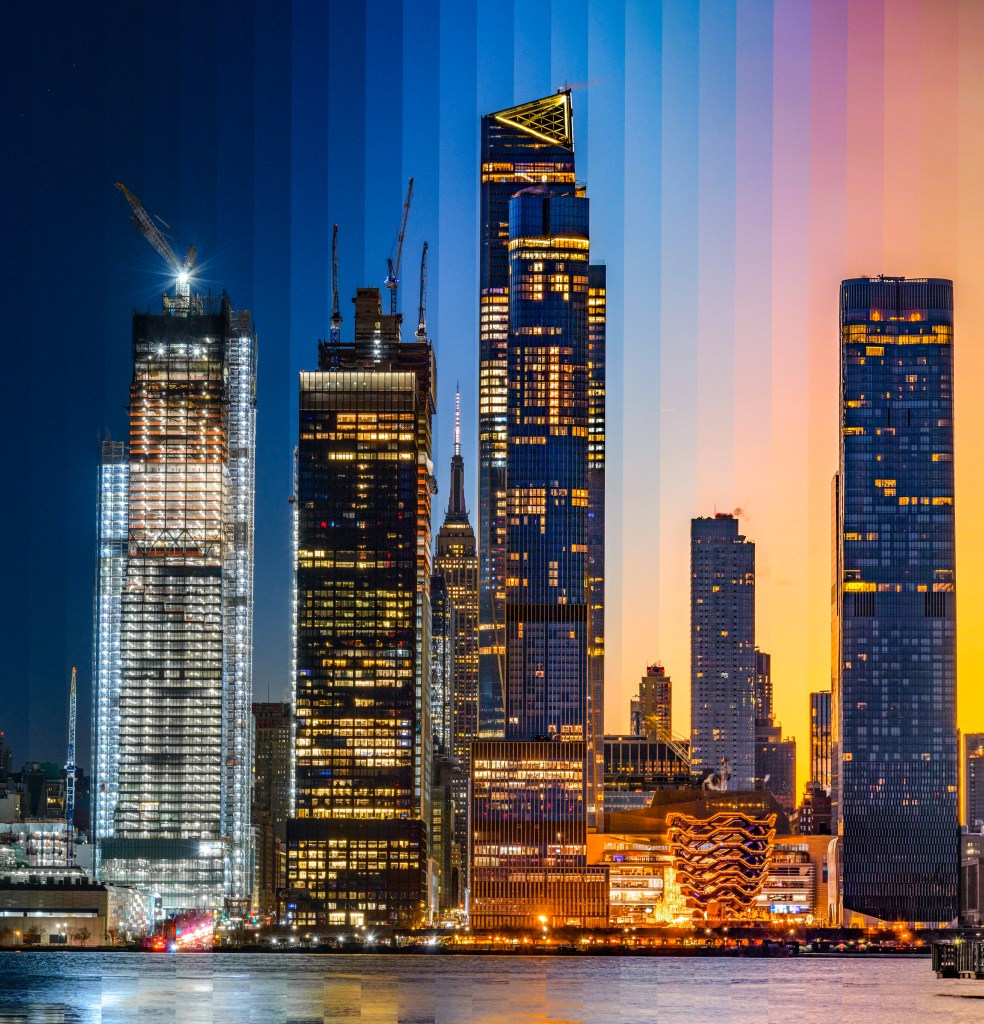
Timeslices are one of my favorite things to do with my timelapse photos. It’s one of the reasons I recommend to always shoot RAW photos and never video for timelapses. They can create a dynamic effect and gradient of colors. Here is how to easily create timeslices with your timelapse photos.
Step 1: Shoot timelapse photos
Typically for a nice timeslice you need to be at the location 45 mins before and after sunrise or sunset. Going from full night to day gives the best effect. Make sure to use a tripod and shoot RAW photos for the best editing capability. The photo needs to be absolutely still so a sturdy tripod is best
Step 2: Edit the photos
LRTimelapse is used to complete the holy grail editing, deflicker, and color correction with Adobe Lightroom. Once you have finished editing the photos, export them into JPEGS in a separate folder
Note: this post is not sponsored by LRTimelapse or Adobe
Step 3: Create the Timeslice
In LRTimelapse, select the Create Composition feature. Choose the folder of JPEGs created earlier. You can upload the files and edit the number of stripes and images and width. Take some time here to edit the framing and orientation to get the best color gradient. Afterwards, export the image and feel free to do some further editing in Lightroom. I typically like to add more vibrance / contrast and gradients of exposures to amplify the night to day effect


Let me know if you have any questions and make sure to check some of my favorite timeslices below!
Brian
Brian | Timelapse Travels (@timelapse_travels) • Instagram photos and videos

Leave a comment